How to Make Low Quality Images: 5 Methods Compared
Compare 5 ways to make low quality images: Photoshop, screenshots, online tools, ImageMagick, and browser-based compression. Find the best method for you.
Need to create a low quality image for a meme, reduce file size, or achieve that perfect retro aesthetic? You have more options than you might think. But not all methods are created equal. Some require expensive software, others compromise your privacy, and many produce inconsistent results.
In this comprehensive comparison, we'll test five different methods for making low quality images, examining their ease of use, quality control, privacy implications, and cost. Whether you're a meme creator, web developer, or just someone who needs to compress images quickly, this guide will help you choose the right approach.
Why Make Low Quality Images?
Before diving into the methods, let's quickly recap why you might intentionally want to create low quality images:
- Meme culture: The compressed, "deep-fried" aesthetic has become iconic in internet humor
- File size reduction: Smaller images load faster, save bandwidth, and take up less storage space
- Privacy protection: Lower resolution can obscure sensitive details in screenshots
- Retro aesthetics: The pixelated, compressed look evokes nostalgia for early internet era
- Email attachments: Many email services have strict size limits for attachments
- Fast sharing: Smaller files upload and download much faster on slow connections
Now let's explore how to actually create these low quality images.
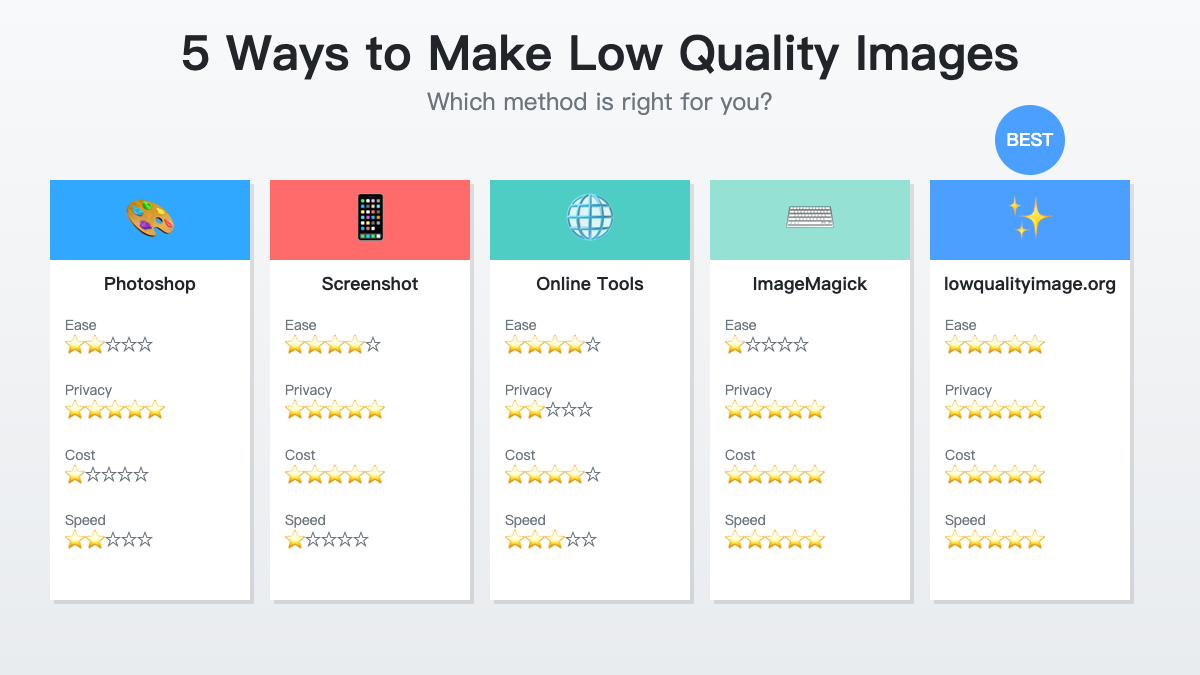
5 different methods compared across ease of use, privacy, cost, and speed
Method 1: Adobe Photoshop / GIMP
How It Works
Professional image editing software like Adobe Photoshop or the free alternative GIMP offer extensive control over image quality and compression. You can reduce quality by:
- Exporting with lower JPEG quality settings (typically 0-50%)
- Reducing image dimensions before export
- Applying blur or pixelation filters
- Using "Save for Web" with aggressive compression
Pros
- Maximum control: Fine-tune every aspect of compression and quality
- Professional features: Access to filters, effects, and advanced editing tools
- Batch processing: Can automate compression for multiple images with actions/scripts
- Format flexibility: Export to any image format with custom settings
Cons
- Expensive: Photoshop costs $22.99/month (or $54.99/month for full Creative Cloud)
- Steep learning curve: Complex interface requires time to learn
- Overkill for simple tasks: Using Photoshop just to compress an image is like using a bulldozer to plant a flower
- Installation required: Large software download (multiple gigabytes)
- Time-consuming: Opening the software, importing, adjusting settings, and exporting takes several minutes
Best For
Professional designers who already have Photoshop and need precise control over the compression process, or users who want to apply artistic effects beyond simple quality reduction.
Real-World Example:
A graphic designer creating social media content might use Photoshop to compress images while maintaining brand colors and specific dimensions. However, for casual users who just want to compress a photo, this is massive overkill.
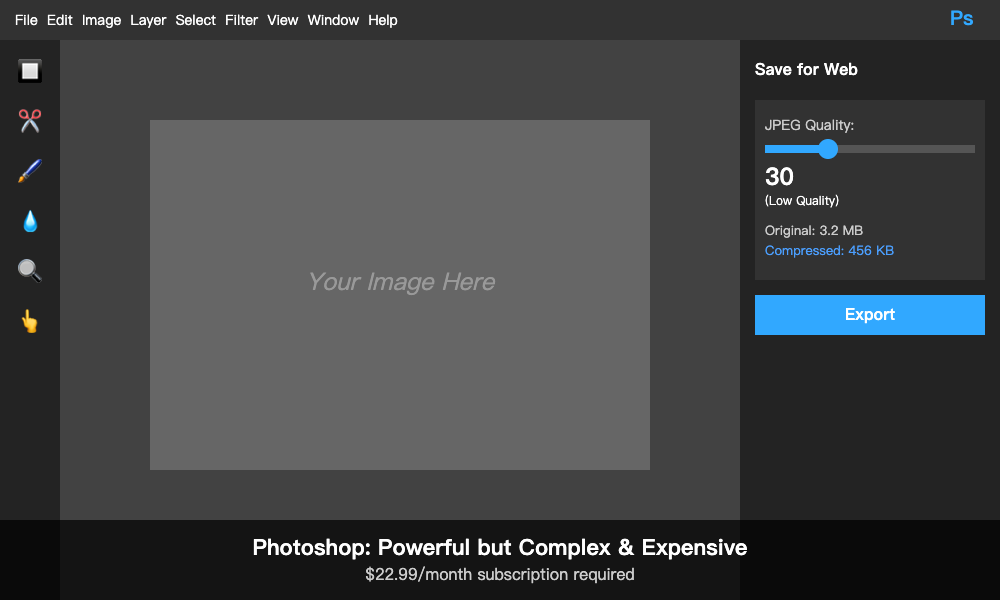
Photoshop offers powerful controls but comes with a steep learning curve and monthly subscription cost
Method 2: The "Screenshot Method" (Mobile)
How It Works
This popular but crude method involves taking a screenshot of an image, then taking a screenshot of that screenshot, repeating the process until the quality degrades to your desired level. Each iteration introduces compression artifacts and reduces quality.
Pros
- No apps needed: Works with just your phone's built-in screenshot function
- Free: Costs absolutely nothing
- Creates authentic compression artifacts: Produces that "genuine" low quality aesthetic
- Universal: Works on any smartphone
Cons
- Completely unpredictable: You have zero control over the final quality level
- Inconsistent results: Different phones compress differently
- Time-consuming: May need 5-10+ iterations to reach desired quality
- Resolution loss: Image dimensions shrink with each screenshot
- Aspect ratio issues: Screenshots may not preserve original proportions
- Awkward process: Repeatedly screenshotting feels inefficient
Best For
Meme creators who want that "authentic" degraded quality and don't care about precise control. The unpredictability is actually part of the charm for certain types of content.
⚠️ Warning:
This method is popular in meme communities, but it's wildly inefficient. What takes 2 minutes of screenshotting could be done in 5 seconds with proper tools. Plus, you'll end up with dozens of temporary screenshots cluttering your photo library.
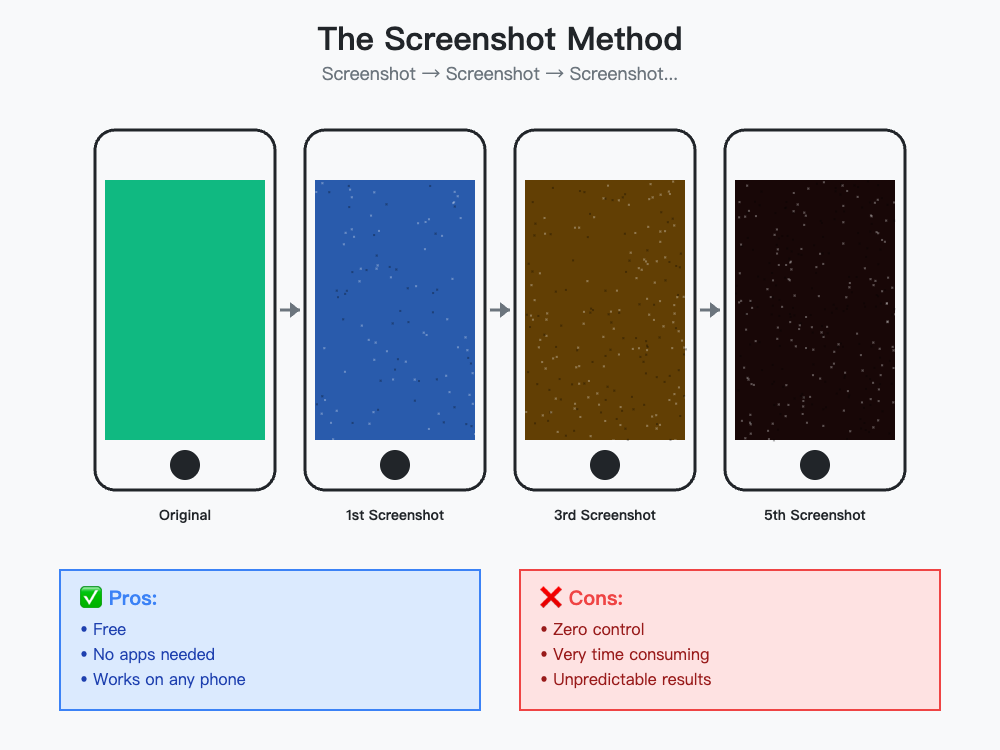
The screenshot method produces unpredictable results with each iteration
Method 3: Other Online Compression Tools
How It Works
Numerous websites offer image compression services. You upload your image to their server, they compress it, and you download the result. Popular options include TinyPNG, Compressor.io, and various "JPEG compressor" websites.
Pros
- Easy to use: Simple drag-and-drop interfaces
- No installation: Works directly in your browser
- Often free: Basic compression is usually free (with limitations)
- Good compression algorithms: Many use advanced optimization techniques
Cons
- Privacy concerns: Your images are uploaded to unknown servers
- Internet required: Must be online to use
- File size limits: Many limit uploads to 5-10MB
- Watermarks: Some add watermarks to compressed images
- Upload/download time: Waiting for files to transfer adds friction
- Limited free usage: May restrict number of images per hour/day
- Variable quality control: Many don't offer granular quality adjustments
- Data mining: Some services may analyze or store your images
Best For
Users who occasionally need to compress images and don't mind uploading to third-party servers. Good for non-sensitive images where privacy isn't a concern.
🔒 Privacy Alert:
When you upload images to online services, you're trusting them with potentially sensitive content. Screenshots with personal information, proprietary business graphics, or private photos could be stored, analyzed, or even accessed by others if the service has poor security. Always read the privacy policy and consider whether your image contains anything you wouldn't want to share publicly.
Method 4: Command-Line Tools (ImageMagick)
How It Works
ImageMagick is a powerful command-line tool that can manipulate images through terminal commands. A typical compression command looks like:
convert input.jpg -quality 30 output.jpgPros
- Extremely powerful: Can do virtually anything with images
- Scriptable: Easy to automate and integrate into workflows
- Batch processing: Process thousands of images with one command
- Free and open source: No cost, fully transparent code
- Precise control: Fine-tune every compression parameter
- No privacy concerns: Everything happens locally
Cons
- Technical barrier: Requires command-line knowledge
- Installation complexity: Can be tricky to install, especially on Windows
- No visual preview: Can't see results until after processing
- Learning curve: Syntax is not intuitive for beginners
- Trial and error: Finding right settings requires experimentation
- Not user-friendly: Intimidating for non-technical users
Best For
Developers, system administrators, and power users who are comfortable with command-line interfaces and need to process many images automatically. Perfect for server-side image processing or automated workflows.
Real-World Example:
A web developer might use ImageMagick in a build script to automatically compress all product images before deploying a website. However, for someone who just wants to compress a single image for a meme, this is severe overkill.
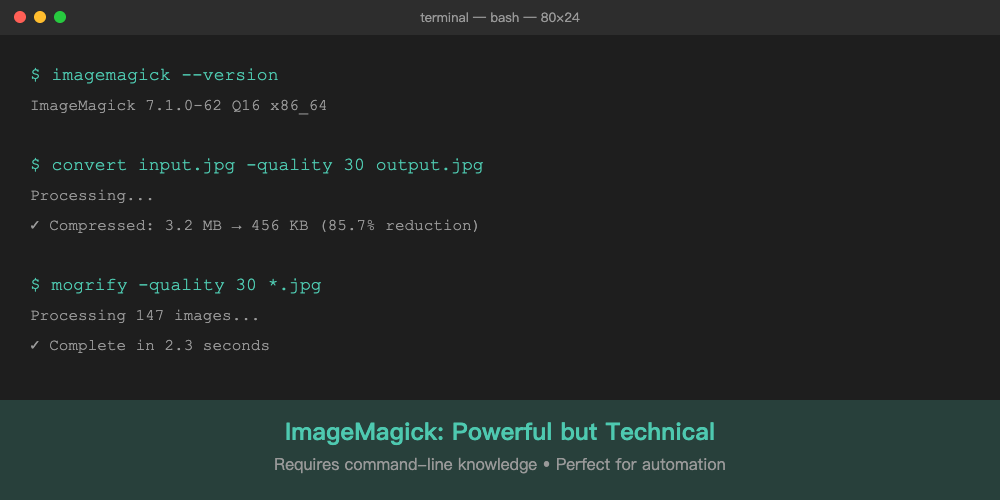
ImageMagick offers powerful automation but requires command-line expertise
Method 5: Low Quality Image Tool
How It Works
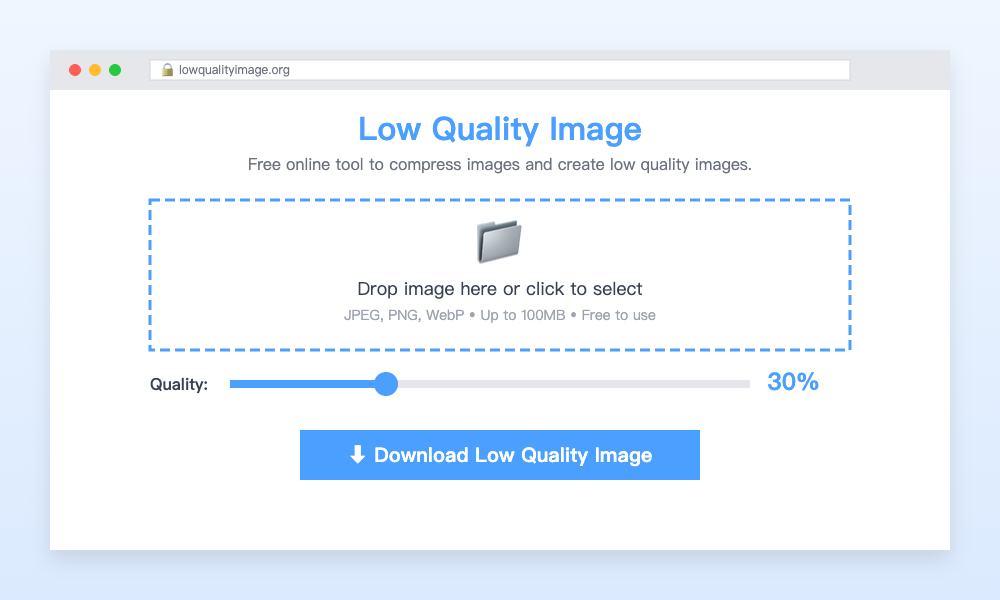
Modern browser-based tools like Low Quality Image use client-side JavaScript to compress images entirely in your browser. You select an image, adjust a quality slider, and instantly see the results—all without uploading anything to a server.
Pros
- Complete privacy: Images never leave your device
- Real-time preview: See exactly what you're getting before downloading
- Precise control: Adjust quality slider to find perfect compression level
- Instant results: No upload/download wait time
- No installation: Works directly in any modern browser
- Free: No watermarks, no sign-up, no limits
- Large file support: Handle files up to 100MB
- Multiple formats: Supports JPEG, PNG, and WebP
- File size comparison: See exactly how much space you'll save
Cons
- Requires modern browser: Won't work in very old browsers (IE11 and earlier)
- Limited to browser capabilities: Can't do advanced effects like Photoshop filters
Best For
Anyone who wants a fast, private, and user-friendly way to make low quality images. Perfect for meme creators, casual users, and anyone who values privacy and convenience.
Browser-based tools offer the perfect balance of simplicity, privacy, and control
Side-by-Side Comparison
Here's how all five methods stack up across the factors that actually matter:
| Method | Ease of Use | Privacy | Cost | Speed | Control |
|---|---|---|---|---|---|
| Photoshop/GIMP | ⭐⭐ Difficult | ⭐⭐⭐⭐⭐ Excellent | $$$ Expensive | ⭐⭐ Slow | ⭐⭐⭐⭐⭐ Maximum |
| Screenshot Method | ⭐⭐⭐⭐ Simple | ⭐⭐⭐⭐⭐ Excellent | Free | ⭐ Very Slow | ⭐ None |
| Online Tools | ⭐⭐⭐⭐ Simple | ⭐⭐ Poor | Free-$ | ⭐⭐⭐ Medium | ⭐⭐⭐ Limited |
| ImageMagick | ⭐ Very Hard | ⭐⭐⭐⭐⭐ Excellent | Free | ⭐⭐⭐⭐⭐ Very Fast | ⭐⭐⭐⭐⭐ Maximum |
| Low Quality Image | ⭐⭐⭐⭐⭐ Very Easy | ⭐⭐⭐⭐⭐ Excellent | Free | ⭐⭐⭐⭐⭐ Instant | ⭐⭐⭐⭐ High |
Which Method Should You Choose?
The right method depends on your specific needs:
Choose Photoshop/GIMP if:
- You already own the software and use it regularly
- You need advanced editing features beyond compression
- You're working on professional projects requiring precise color management
- You need to apply filters or effects while compressing
Choose Screenshot Method if:
- You're making memes and want that "authentic" degraded look
- You literally have no other options available
- The unpredictability is part of the artistic process
Choose Other Online Tools if:
- Privacy isn't a concern for your images
- You need smart compression that optimizes automatically
- You're compressing product photos or other non-sensitive content
Choose ImageMagick if:
- You're comfortable with command-line interfaces
- You need to process hundreds or thousands of images
- You want to automate compression in scripts or workflows
- You're a developer building an image processing pipeline
Choose Low Quality Image Tool if:
- You want fast results without complexity
- Privacy is important to you
- You want to see exactly what you're getting before downloading
- You need precise control over quality levels
- You're making memes, compressing for email, or reducing file sizes
- You want something that just works without hassle
Conclusion: Browser-Based Tools Win for Most Users
After comparing all five methods, it's clear that browser-based compression tools like Low Quality Image offer the best balance of convenience, privacy, and control for the vast majority of users.
While professional software like Photoshop has its place and command-line tools are perfect for automation, most people just want to compress an image quickly without uploading it to unknown servers or learning complex software. Browser-based tools deliver exactly that.
The screenshot method? It's a fun internet curiosity, but there's simply no reason to use it when better options exist. And traditional online compressors require trusting third parties with your images—a trade-off that's no longer necessary.
For 95% of use cases—whether you're creating memes, reducing file sizes for email, or optimizing images for faster loading—a privacy-focused browser-based tool provides the perfect solution: instant, private, and completely free.
Ready to make low quality images the easy way? Try Low Quality Image right now—no sign-up, no upload, no hassle. Just drag, adjust, and download. Your images never leave your device, and you'll have results in seconds.
Ready to Compress Your Images?
Try our free online image compression tool. All processing happens in your browser - fast, private, and easy to use.
Related Articles
Make an Instagram 3×3 Grid From One Photo (Without the Order Coming Out Backward)
Split one photo into a 3×3 Instagram grid the right way: prep the aspect ratio, use live grid lines, and post in reverse order so the mosaic does not scramble.
How to Reduce Image Quality Online in 3 Steps (No Software, No Upload)
Reduce image quality in 3 steps with a free online tool that runs in your browser. No software, no upload, no watermark. Works for JPG, PNG, and WebP.
HEIC vs WebP: Which Format Should You Use in 2026?
HEIC and WebP are both next-gen formats with very different strengths. Compare compression, quality, and compatibility to find the right one for you.